
it is time to learn a bit more so let’s see how we can build a form, add some validation and post back the user input.
If you need to revisit the concepts we covered already, here they are : Part 1, Part 2
We will continue working on the same project so you should have it open and ready :).
We will create a form which takes data for a Person and posts it back to the Controller.
So, let’s go to the TestController first and create two new actions. We will call them both Create :
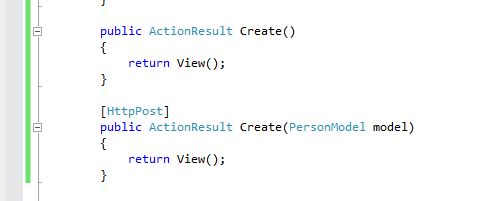
The first one is the one which will display the form.
Then once the user fills in the data and presses the Submit button, they will be taken to the second one. Please note that we decorated the second Action with [HTTPPost] and we are also passing the Model as parameter. The MVC engine will take care of us in this respect.
In order to avoid any issues, at this point delete all the other actions created by default when we created the TestController. so, just keep Index and the 2 create actions and delete everything else.
Now we need to create the View :
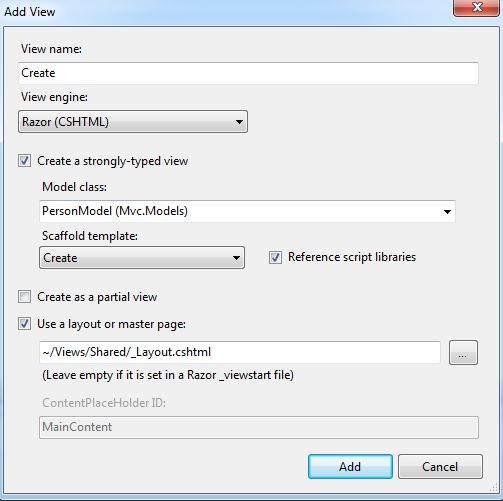
This time we select our Model class already, we told MVC to use a scaffold template for Default so we will effectively get a functional form straight away :
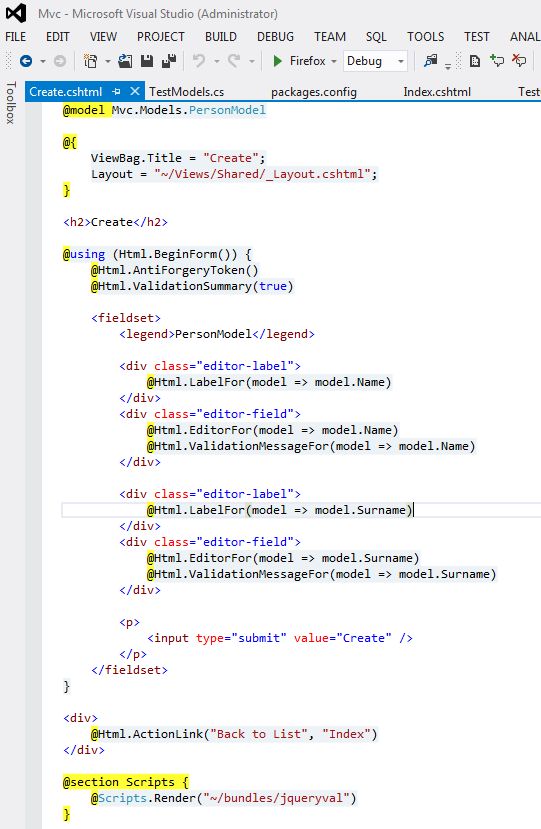
You can see we already have the form and validation fields. Since we want to capture the data, it would probably be a good idea to mark the Name and Surname fields as Required.
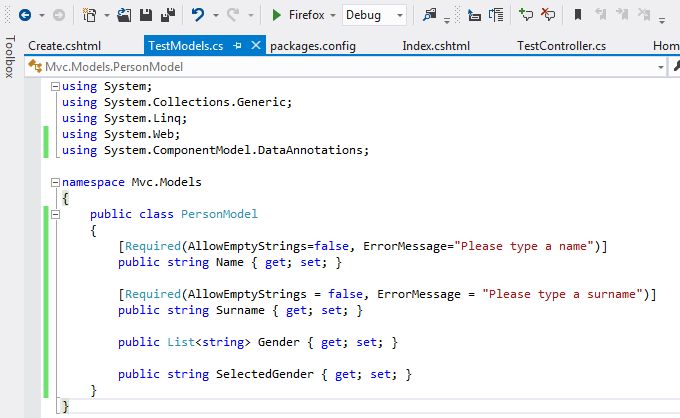
All the basic validation can be done in our Model class. All we have to do is open the TestModels class and decorate both Name and Surname public properties with [Required].
We need to a new using line in our code to tell the system where to find the required tag : using System.ComponentModel.DataAnnotations;
Our Model will now look like this :
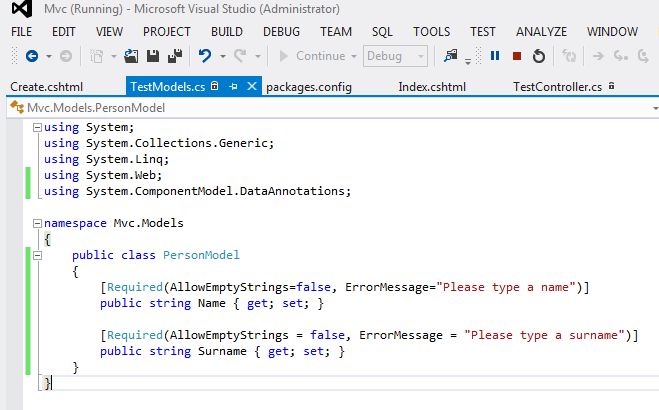
Please note how we told the system to not accept empty strings and also what the error message should be displayed.
So, if at this point we run the site , go to /Test/Create, not type anything and then press Submit we will see this :
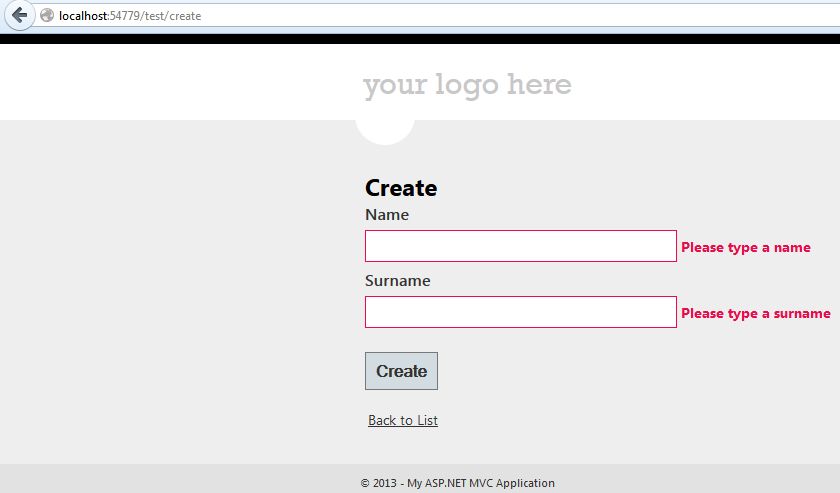
Cool, huh ? 🙂
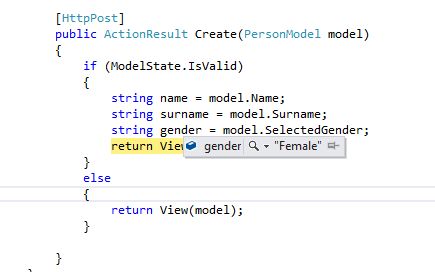
We’re not done yet. We need to write more code in our Controller to deal with the post data properly and take care of validation errors as well :
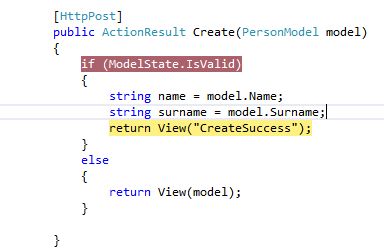
First we check that the data in the Model is valid, in our case we do have some data for both Name and Surname. At this point, we would save it to a database for example and display a simple View with a success message. We’ll leave this to you, you should be able by now we create the proper View that can do this.
If our ModelState is invalid then in typical MVC fashion we would simply redisplay the view passing in the Model. The result of this is that the form is displayed again with the correct error messages in the right place. This happens because our model would have everything it needs inside it.
So, we have seen how to create a simple form, add model validation and look at the post data inside the controller.
Let’s spice this up a little. Let’s say we now want to display a DropDownList and capture the selected value.
I chose dropdown because this one is a bit special, it requires not only the data itself but also a separate field to capture the selected value.
Let’s edit the model to support this scenario :
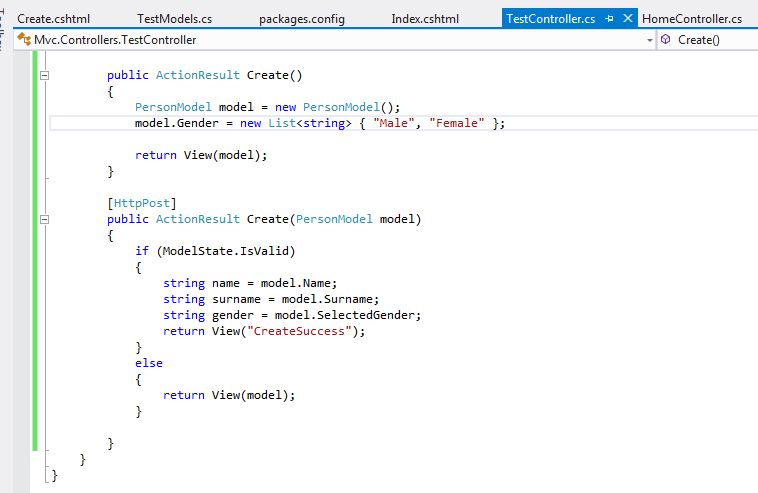
Let’s update the controller as well so we have some data to send to the view :
Ok, we’re all ready, the last thing is to edit the View to display this dropdown :

If you look at the HTML Helper for DropdownList, you’ll notice that the first thing we tell it is where the post value is stored in our model and that is the SelectedGender property. Then we create a SelectList from our Gender data. There are more ways to build the dropdown and I encourage you to explore them all as they will come in handy at some point.
Now, let’s visit the Test/Create again, type some data for name and surname, choose female in the dropdown and press Submit.
The result is :
Another simple scenario is to add an email field and validation. Armed with everything you’ve learnt so far you you should be able to do this on your own. The only missing piece of the puzzle is in the model, in order to tell it that the field validation is the one required for email we will simply add a new tag [EmailAddress]. See if you can add everything you need in order to make this work.
There is another way of retrieving data from a form post. In real applications we usually have a lot more happening on a form, we could use some Jquery to populate a hidden field for example and then post that data back, or any other functionality. The point is that we do not always have the luxury of using a model to simplify our life.
So let’s see how we can have a form and postback the data WITHOUT using a model.
Let’s modify the HttpPost action so that it does not take a model as parameter anymore. Instead it will take a FormCollection object.
So our action now looks like this :

Let’s see what happens when we submit the form :
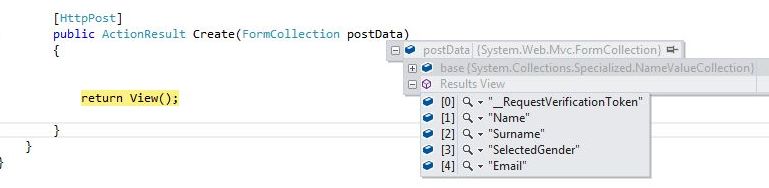
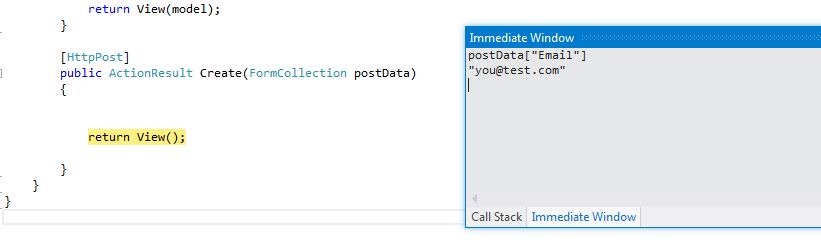
As you can see, the FormCollection object has a field for every submittable field in the form. We can peak inside these fields to see the values :
This concludes Part 3 of this tutorial.
